The shower was a great success today and also exhausting. I nearly started this post with 'hello," because I thought it was an email...oops.
I think it's bedtime soon!
But first...
Here's the personalized quilt. I used Thimble Blossom's Hopscotch pattern because I just loved it. It's kind of modern and fun. Also surprisingly simple to piece, but time consuming like all quilting. I find it therapeutic.
I matched the colours to suit their tastes and used fabrics that were meaningful and fun. The London print represents their time spent working in London, and also their honeymoon destination.
Detail of appliqued, embroidered patch with their wedding date.
My good friend Leslie helped me do the long-arm free motion quilting. I had a lot of fun and learned how to tackle loop-de-loops on my own.
I loved how the overall pattern turned out with dark and light pieces.
I did several variations in photoshop beforehand, I find this really helps me lay things out before cutting. It creates a map of what will go where.
Ta Da! (And some Inspector Morse dvds.)
Once I was done it was time to wrap it. I couldn't find a pre-fab box that was the right size or suitable so I decided to make one.
My art studio mate Laura is a sculptor of geometric objects like the one below, and she is a box making pro. She gave me the idea to make the box and lent me her pro tools. (digital protractor, glue gun, cardboard). Thanks Laura.
After many sketches, I decided to make a simple round hat box and decorate it.
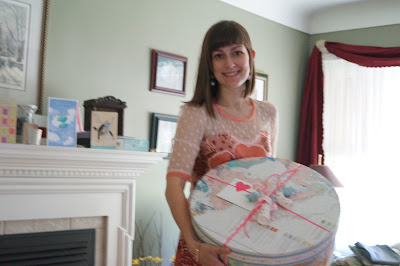
Here it is. Covered with maps and wallpaper.
Curled strips of wallpaper added to the ribbon bow.
Side view, the colours on the map and floral print were a great match (and each reminded me of the bride & groom)
On my way to the shower! Hey, that dress is familiar.
Here's a hat box tutorial because it turned out so neat I want to share my fun:
It's fairly simple but effective.
Draft a circle of your desired size and cut two from sturdy cardboard. (I used the pencil and thumbtack-on-a-string compass method for making a large 18" circle, but you could trace a plate or other object).
You'll need to know the circumference (C= πd for a math recap). Cut rectangular strips for the lid and side of box the length of the circumference. For the strip width I used a 2.5" strip for the lid and 6" strip for the box side. If you need a super long strip like I did, feel free to join two smaller lengths together to reach the circumference measurement.
The fun part: You'll need to score the strips so they curve around the circle. The best way is using a cutting mat with a grid. Lay out your strip so it's square on the mat, and with a ruler and exacto knife, gently score vertical lines every 1" along the length of the strip, using the grid as a guide for even spacing. Using a bone folder or blunt scissors, score again along each cut, indenting the cardboard in a little and pressing fairly firmly. This will allow for a smooth curve on the outer face of the cardboard. Scored side will be the inside of the box.
Repeat for other strip.
For the lid:
Lay the strip on the table scored side up, and run a short strip of hot glue close to the top of the strip. Glue the edge of the circle along the glue line. Keep gluing, and rolling the circle to the right until the strip is wrapped around the circumference and outer edge of circle
For the bottom:
You'll glue the strip to the circle in a similar manner as above except the bottom needs to fit inside the lid and be slightly smaller around. To achieve this, lay the circle flat and instead glue the strip around its circumference, but on the face of the circle, not the edge like above. This will make the box slightly smaller and guarantee the lid will fit.
For both lid and bottom, join ends of strips where they meet with masking tape or more glue.
I covered the boxes using spray adhesive and paper maps/wallpaper and the bottom is fabric. Any of these coverings work well, as long as they aren't too thick.
To achieve a smooth look, start by spraying and covering the circle top and then bottom before covering the sides. The paper should be larger than the circle. Once paper is adhered to circle, trim around leaving a 1" lip of paper. This excess it will fold down and be glued to the side to form a neat edge. Snip the excess 1" paper rim every inch , cutting toward the box and glue each 'tab' down onto the side.
Using rectangular strips the same size as the original cardboard strips, glue paper onto sides of box and lid.
I coated the paper with a water-based varnish to protect it a little but that's optional.
You've done it! If you're really ambitious, you could cover the inside also, or make different sized tiered boxes, or even an oval box.
I apologize if those instructions are convoluted but I'm ready to crash any moment.
I'll leave you with a photo of the bride to be, in an apron covered in bows.
Ain't she cute?


